Hydrangea Headgas Alive is among the most exquisite and efficient methods to define and add structure to your garden. Growing hydrangeas as hedges allow you to add as much height, impact, colour, and texture as you need to your surroundings. With their magnificent blooms, they enhance the curb appeal of your house and create a statement in landscape design.
This season, will you employ hydrangeas as a flower hedge in your garden? Contrary to popular belief, choosing the appropriate variety of hydrangeas can result in excellent hedges. This post contains the best advice for growing hydrangeas as hedge plants this year.
Choose the Right Location
You most likely already know where you want to develop a hydrangea hedge if you choose to plant one. Take notes and get acquainted with the area. Consider the following inquiries for yourself:
- How much sunshine reaches the hedge?
- How much room do you have so that your hydrangeas can grow?
- Are there any nearby walkways or patios that you should consider?
There’s a plant for every situation; there’s never a “wrong” place to put it. You can grow a strong hedge and make wise selections if you watch these elements!
To meet the plant’s growth requirements, you also need to choose a location with rich, healthy soil. Before bringing your hydrangeas home, you might want to add some organic material if your soil is heavy or sandy.
Choose the Right Variety
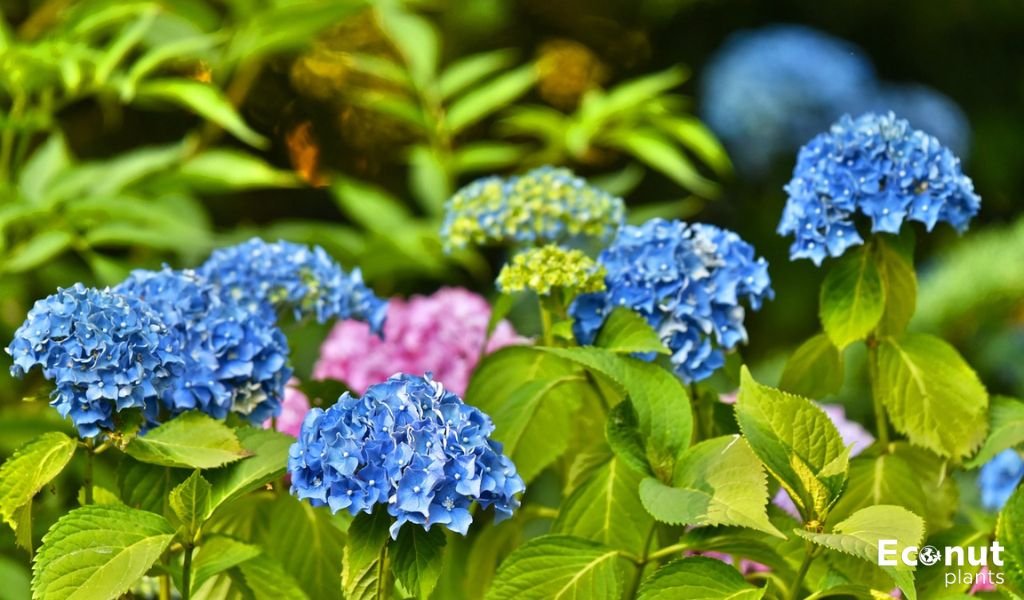
A deciduous shrub with stunning, abundant flowers in various colours, the hydrangea, often referred to as hortensia, is a highly valued flowering plant. There are evergreen and deciduous species. However, the only kinds that are typically planted are deciduous ones.
The remarkable appearance that has made this species one of the most well-known in the world is mostly due to the colourful and comparatively big flower heads of hydrangea cultivars. Though most often planted as free-standing specimens, hydrangea shrubs are also great for hedging due to a number of their many beneficial traits.
Prep and Amend Your Soil
After relocating your plants indoors, you need to get your soil ready. This should be a simple operation if you are planting your hedge in an existing garden area.
Still, if you are planting in a new garden, it will require work. Despite its modest appearance, grass poses a serious threat to hydrangeas, which are in dire need of water.
It’s also a great opportunity to adjust your soil. When there are no plants to obstruct the way, adding compost will be easier if it’s necessary. You can also proceed with adding a soil acidifier at this time if that is your intention.
Measure Your Hedge
Before you go to the garden center, measure something with a tape measure, and then go outside to your garden. You need to measure the length and width of the space before planting your hedge. This is an important stage.
It will assist you in selecting the kind of hydrangea that is best suited for your region and guide how many plants to purchase. Put your measurements down on paper so you won’t forget them!
When you get to your garden, buy a tape measure from the garden center. Before you plant your hedge, measure the length and width of the space.
Space Them Properly
Your hedge’s effectiveness will depend on how much space there is between your plants. Depending on the hydrangea you select, this will change. Staking is a simple way to ensure you have a sufficient number of plants.
Additionally, you can rearrange them until you find the ideal fit. It’s a lot simpler than planting a hydrangea, pulling it up, and beginning over.
Plant with Support
Once all of your stakes are in position, take a piece of yarn or garden twine. Draw a straight line connecting each stake and move them individually as necessary. This will ensure that your hedge grows as straight as possible.
It’s now time to start excavating. Using the core of the plant marked by the stakes, you can begin digging. After placing the hydrangea where you like, backfill with your garden soil.
Take a step back after planting each hydrangea to ensure that your hedge remains straight. Continue doing this until all of the plants are planted.
Use Soaker Hoses
Once you’ve planted your hydrangeas, now is an excellent time to install soaker hoses or drip irrigation systems. Of course, this is not required while growing a hydrangea hedge, but it will ensure that your hydrangeas receive consistent watering.
Your plants will be smaller at this point, making it easier to install your irrigation because you can easily maneuver the hoses around the plants. Simply wrap the hoses around the plant’s base, taking care to leave enough space between them to prevent them from coming into contact with any parts of the plant.
Prune Regularly
Pruning can be a little intimidating at first, but it becomes easy as you figure out a few things about your hydrangeas. Time is the key to properly pruning hydrangeas. Some hydrangeas wait until spring to produce flower buds, while others do so in the autumn.
Another thing to think about is whether or not you want to prune your new hedge. Some hydrangeas are not good candidates for pruning into a traditional, tight hedge. Alternatively, you might leave them to grow wild or trim them to keep the bushes looking as good as possible.
Water Regularly
Watering hydrangeas requires approximately one inch each week. It could be challenging to remember this if your drip hoses are already attached. Simply using your hands to test the soil is the alternative. The soil should be moist even after you squeeze it; water should not run off.
Hydrangeas are quite good at telling us when they need water. If you see that your hydrangea’s leaves are falling to the ground on a sunny afternoon, your plants most likely need water.
Give every plant an equal amount of water. This can help to ensure that every plant you cultivate grows to maturity and that, in the end, you don’t have a dead plant, which could result in an unsightly hole in your hedge.
Be Patient
Depending on the size of your hydrangeas, it may take some time. Although they grow quite quickly, hydrangeas might take up to five years to reach their maximum size. You’ll reap the rewards of giving your hydrangeas consistent, cautious care.
Consider planting coleus in your shaded areas and shorter sunflowers in your bright ones. These will aid in providing some seclusion until your hydrangeas reach full maturity.
Fertilize Only When Needed
Not a lot of fertilizer is required for hydrangeas. Nonetheless, it is advantageous to apply in the spring. Over-fertilization leads to weak, lanky growth. When fall fertilizer is applied too late in the growing season, it may promote growth that is more susceptible to winter frost damage, which will look less attractive overall on your hedge.
In the spring, use a standard fertilizer (10–10) or one designed specifically for hydrangeas. Pay attention to the labelled directions to determine the proper application rate.
Conclusion
Play with your hedge of hydrangeas. Your hydrangea hedge will be easy to manage if you take your time setting it up! You may guarantee gorgeous flowering hydrangea hedges for many more seasons by adhering to the important guidelines mentioned above!