The garden is seeded with kale six to eight weeks before the last frost. Transplanting should begin six to eight weeks before garden planting. Transplants can be started in the garden two weeks after the last frost and up to five weeks beforehand.
Compost, or old manure, added to loamy soil is the perfect combination for growing kale. Reduced leaf taste can occur in both light sandy and thick clay soil types. After planting, how quickly will kale grow in your garden? This page includes an extensive guide to growing kale from seed.
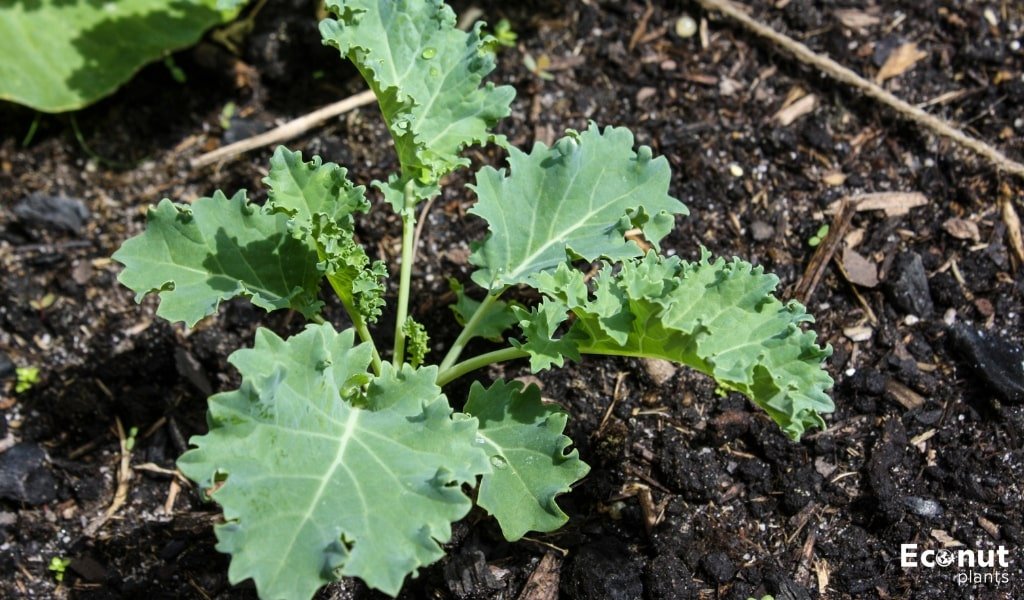
Recognizing the Kale Seed Germination Process
There are two ways you can start kale from seed. In late summer or early spring, depending on your growing zone, you can immediately seed kale outside. As an alternative, you can direct-sown your kale and allow it to grow to maturity. At that point, you can pluck leaves from its lanky stalk for several months at a time.
Once it reaches maturity, kale, a crop for the cool season, may tolerate some frost. Growing greens in the autumn provides additional benefits because they may be harvested well into the winter, unlike some other crops. The recommended soil temperature for kale germination is between 60 and 65 degrees.
Depending on the circumstances, kale seeds can germinate in as little as three to twelve days. Review your growing conditions and reseed if seeds haven’t sprouted after this period!
A Comprehensive Guide to Planting Kale Seeds
These are little seeds. Sow kale seeds directly, being sure to sow them ¼ inches deep. When the seeds are three inches apart, space them out until they are six or nine inches apart. The mature spacing is between 18 and 24 inches.
Sow two to three seeds per cell or transplant container when starting kale indoors. Choose the strongest seedling after germination, and then cut the other one at the soil level. This will ensure that every cell you plant will grow, even though 100% germination is rare.
Seedling Care for Kale Growth
Maintaining kale seedlings is comparable to caring for other types of seedlings. The process is rather simple, but there are certain key concepts to keep in mind.
Light
Light is necessary for all seedlings to grow, and unless you are beginning your seeds in a greenhouse, the natural light in your home is probably not going to be sufficient. Because of this, we suggest using grow lights!
Generally speaking, you should always place your grow lights four to six inches above your seedlings, elevating them as they become bigger. The illumination that we recommend is LED. They are more expensive, but they last longer and use less energy.
The majority of seedlings require 16 to 18 hours of light per day, so make sure they get enough light by setting your grow lights on a timer!
Temperature
The ideal temperature range for kale planting is between sixty and sixty-five degrees Fahrenheit. It is typically not required to use a heat mat to guarantee successful sowing inside.
Just keep an eye out for frigid nights if you’re sowing in a shed or garage without temperature control, as this might damage delicate seedlings.
Water
Water is vital for the entire life of the plant, but it is especially crucial between sowing and germination. To come out of dormancy and germinate, seeds require a lot of water. For the embryo inside to emerge and take root in the soil, water causes the seed coat to enlarge and become softer.
The embryo cannot come out if there is insufficient watering! Until they germinate, give your seedlings two days’ worth of watering, being careful not to submerge them. You can give the plants a good daily irrigation once they have germinated.
Airflow
Airflow is vital for every seedling! Keep a window open during the warmer months or run a fan in the room to prevent fungal diseases in your seedlings early on and grow stronger, more mature plants.
Growing kale seedlings is so simple that even inexperienced gardeners can take care of them. Don’t overthink it; your seedlings want to grow!
When and How to Transplanting Kale Seedlings
Four to six weeks before your area’s usual last frost date, you can transplant kale outside. This can be delayed a little bit with season-extending methods like frost cloth or low tunnels.
When transferring kale seedlings, spacing is important to consider. Mature spacing is between eighteen and twenty-four inches. Plant the seedlings with their stems exposed, only half immersed in the dirt. Just enough to keep temperature swings from pushing the transplant out of the soil—not too much that the stem can’t decompose.
Hardening Off Kale Plants before Transplanting
Every seedling cultivated indoors needs to go through the hardening process. It’s a great idea to start seeds indoors to ensure vigorous plants and longer harvest times. They must be gradually acclimatized to the outside world, though, just like any other swaddled new-born!
When the kale seedlings have hardened off, they are prepared to be planted outdoors. Start one or two weeks before the transplant operation. After moving your seedlings outside, give them about an hour. The following day, divide them in half, and so forth.
Once they’ve spent the whole day outside, gradually increase the amount of time they spend outside. As dusk falls, keep them inside. By acclimating them to the environment gradually, you can prevent transplant shock in your outdoor seedlings.
Thinning Kale Seedlings for Optimal Growth
Thinking is the process of adjusting plant spacing by slicing seedlings at the soil’s surface. Several seeds are sown into each cell during the thinning process, and each seed is then removed separately.
A good way to do this would be to plant seeds close together and then, as the seedlings grow, pull off the tops to provide the appropriate spacing. Seedling thinning is caused by several reasons.
- To avoid upsetting the roots, we clip seedlings rather than pulling them up. Young seedlings have extremely delicate roots, so removing one could upset the one you’re attempting to keep.
- When working with healthy plants, thinning facilitates proper plant spacing. To ensure full growth, you would plant multiple seeds in each cell, carefully space them apart, and then gradually thin them out. This implies that you won’t have to worry about picking fewer, less-than-healthy plants if you select the plants that look the best as they all grow.
- Planting densely rather than sparingly would produce a lot of closely spaced, most likely unhealthy plants. Because there is little airflow, plants that are too close to one another compete for nutrients and transmit fungal infections. These plants don’t need as much space between them as adult plants do because they will never mature.
It’s important to give your kale plants enough room to grow to their full potential without having to compete with one another. Thinned seedlings make this possible!
Best Fertilizer Methods for Kale Plants
Numerous commercial fertilizers can be used to fertilize kale plants. Generally, you would want to seek out a nitrogen-rich fertilizer. Nitrogen is essential for the development of lush foliage, which is ideal for all those cool-weather greens.
It’s worth thinking about using a nitrogen-rich fertilizer once every four weeks as well as a fish fertilizer every other week! It’s usually beneficial to feed kale early in the season. To ensure that the soil in which your kale starts is nutrient-rich, amend the soil a few weeks before planting with a few inches of compost.
Watering Needs for Kale Plants
Kale doesn’t require an excessive amount of irrigation. Kale will stay sweet and nutritious if it receives a consistent supply of water during the growing season. Make sure your kale plants get just the right amount of moisture without becoming too damp.
Pay attention to your rain gauge. Make sure to continue irrigating your kale plants during dry spells. Mulching the area around your plants will help retain moisture and reduce weed pressure.
Kale Leaf Harvesting: Techniques and Timing
It can take up to two months for kale to reach a mature enough size to start gathering leaves. Since kale is a biennial, you can grow it all summer, but pests or heat usually get to it before you can. Harvesting throughout the winter is a great option for growing kale for an autumn crop, as the frost makes the leaves sweeter!
The leaves grow more resilient as they age. It’s important to harvest kale leaves in a way that allows the plant to continue growing. Remove the leaves by trimming them off the base of the stem, leaving the main stalk about a quarter of an inch long. Refrigerated kale leaves will last for around a week.
Kale Protection from Common Pests
Keep an eye out for the numerous common pests that affect kale in your garden. You should be able to save your harvest if you identify and manage the majority of pests early on!
Mites
Spider mites are among the most prevalent of the many varieties of mites that exist. They may result in plants that appear sickly and have yellowing foliage. These sucking pests are similar to aphids. Applying neem oil or using a hose to get rid of them works similarly to how aphids are treated!
Aphids
One of the most prevalent pests in the garden is the aphid. They adore succulent foliage, much like we do with our kale. It is difficult for them to get back up. If the infestation is extremely severe, adding neem oil or insecticidal soap every two weeks can help keep populations low.
Slugs
Slugs enjoy consuming a diverse range of vegetables, and kale is no exception. This is because slugs prefer to come out in the early evening and go back to their houses during the day, which is usually when you are doing your studies or when the weather is cool.
There are many well-tried methods for controlling slugs. Some common ones include covering your plants with wood ash or diatomaceous earth.
FAQ
Is growing kale from seed difficult?
Growing kale from seed is easy, affordable, and rapid. If you live somewhere where there is a late spring frost, you can start seeds indoors. If there is no possibility of frost, you can start your kale seedlings outside in temperatures between 60 and 80 degrees.
Does light help kale seeds germinate?
For your kale seeds to sprout, you must keep them moist and warm. To generate these circumstances, cover the seed tray with a plastic bag. Sunlight is not required for the seeds to sprout.
Are there kale seeds in each hole?
The seeds need to sprout within 7–10 days. Plant seeds: Plant 3–4 seeds 5 mm (¼”) deep in each location. Reduce it to the most robust plant. Space rows 75–90 cm (30–36′′) apart, with a 45–60 cm (18–24′′) gap between each row.